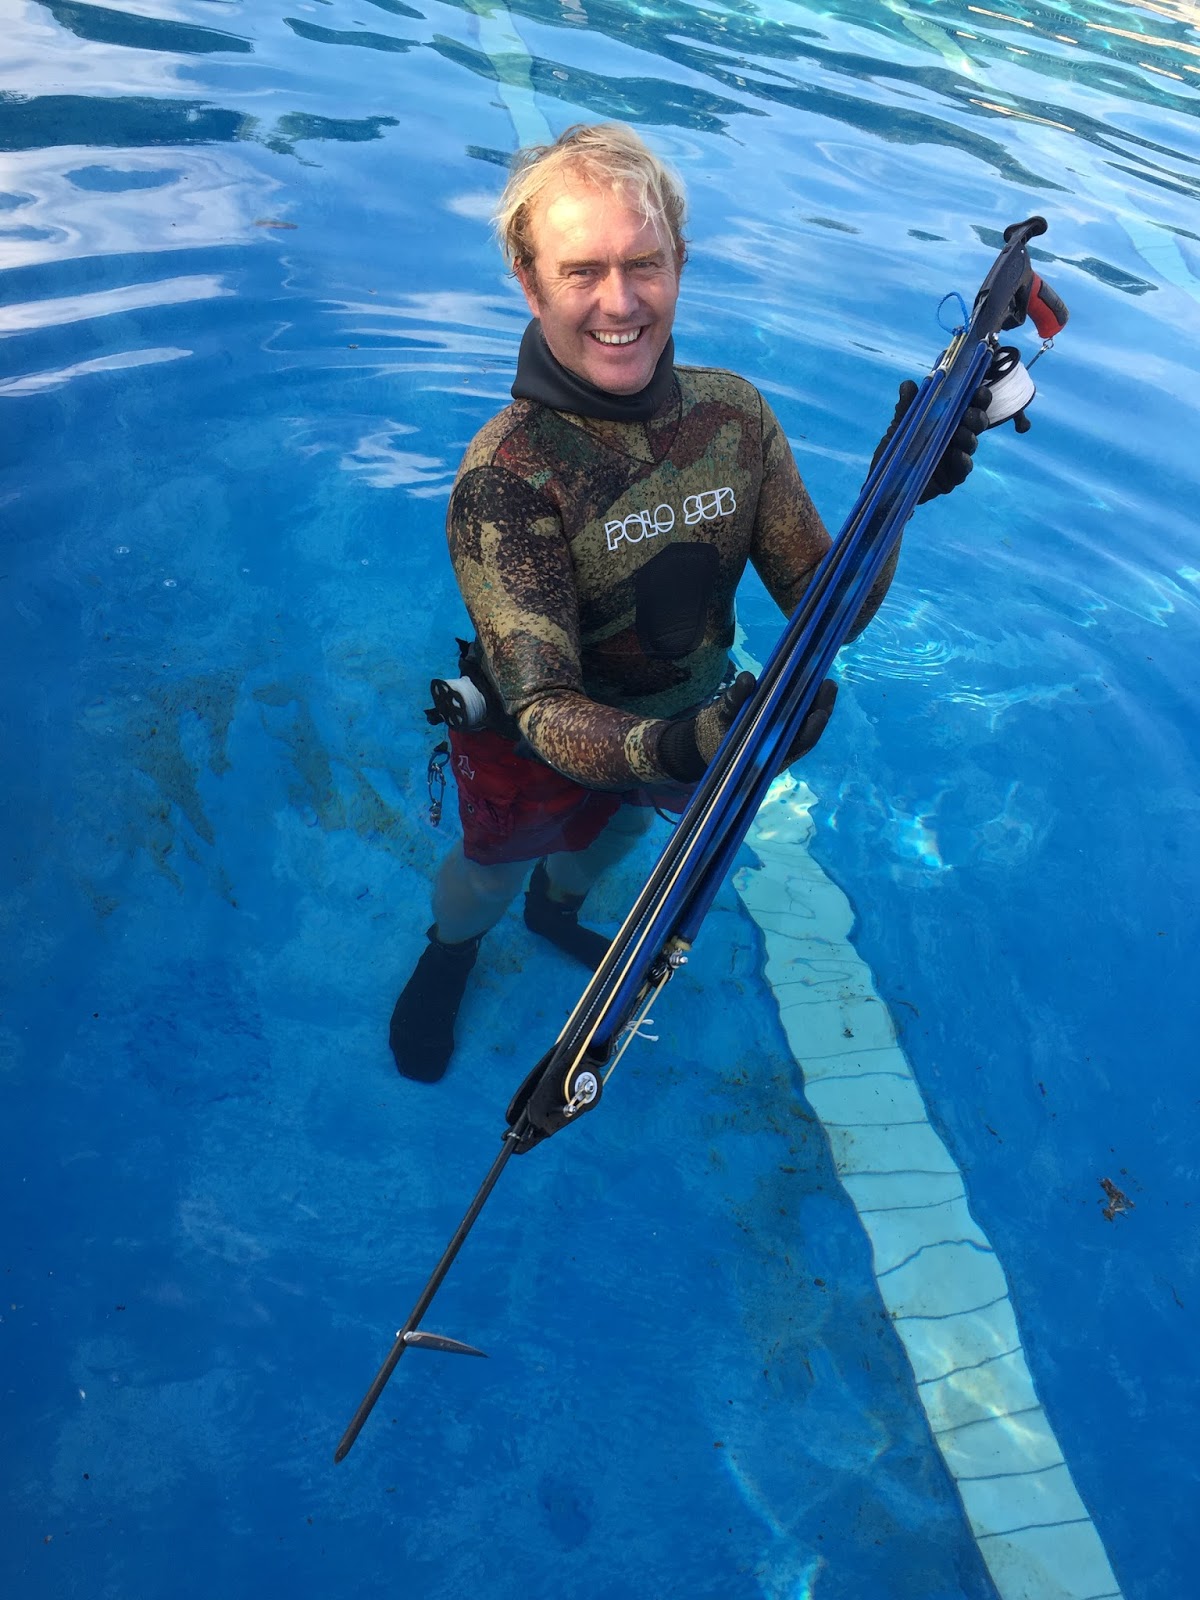
Suppliers & Stockists of all leading Brands of Spearfishing & Free Diving Equipment.

From Picasso, Omer, Rob Allen, Free Divers, Cressi Sub, Lizzard and More...
"I only sell equipment that I would dive with."


Click here to eMail Coatesman

Wednesday, June 17, 2009

XFin Composite Spearfishing Blades and Foot Pocket Assembly

Here is a basic step by step way to fit your Xfins or other composite freediving fins in you foot pockets.
Some of the components my vary but the basic principals should be the same.

Step 1
Trim foot pocket ends
First you will need to trim the ends of the foot pockets sides. There is a small nib which normally fits into the plastic blades. I trim this at a 45 deg angle so it does not catch on line etc. Remember only trim a few mm ... 
Step 2
Insert Xfin into foot pocket
Next insert the Xfin blade or similar into the foot pocket, pushing the blade as deep as you can. Very important rememeber that the bolt must not sit in the bend of the fin!! This should be about 10mm past the bend, or you will create a weak spot. If the bolt hole is on the bend you might need to trim the end of the blade that goes into the pocket so that it can go deeper in. It some times helps using an existing blade as a template so you know how much to trim.
Once you are confident the blade is sitting in the pocket and is not skew, mark the hole and drill to the correct size for the bolt to fit through.
NB dont tighten the nut and bolt too much, just enough for the lock nut to take on the bolt and secure the blade.
Step 3
Step 3 glue or silicon the grooves
This next step is not always necessary, but will avoid some frustration down the line. Some foot pockets have larger grooves than others and don't grip the blades all that well, and pop out when bent.
I suggest gluing or siliconing the blades in place.
I personally use silicon (I try find the hardest grade) as you can always remove the blade and get the silicon off at a later stage. With glue that might not be an option. Other glues that work well are Sekaflex and in extreme cases Locktight.

Using a nozzel fill the grove with silicon, just enough to fill all the loose space....(with glue you use a lot less)
This is a messy job and it will be handy to have a roll of Bog roll near. .... the best stuff for wiping silicon up.
Step 4
Getting the sides on can be tricky
Pushing the sides on can be tricky ... oh and you will get the silicon on you hands!!
Bend the sides right back opening up the grove and push it onto the blade. The blade edge will slip into the grove and the silicon will fill the gaps


Here is a small video clip that might help.


Some of the silicon will ooze out, just wipe it up with bog roll or tissue paper.


Step 5
Now that you have the sides on make sure that the blade edge with the ridge on is properly in the groove. I use the handle of a hammer to tap the edges onto the blade. 


I hope this helps you in getting you Xfin or similar composite freediving /spearfishing blades into your favorite foot pockets.


Cheers


Coatesman

Sunday, August 10, 2008

Rob Allen Bluewater Floatline Boingie

Rob Allen Bluewater Floatline Boingie

At a Glance: It was last year while sorting out our kit for a Mozambique spearfishing trip when Rob Allen first showed me the new Bluewater Floatline Boingie. It was something the Dive Factory had been working on for some time, and had finally come up with the right tubing for the job.

Rob showed me the tubings resistance to tearing when, or if it got a cut. And it was quiet amazing, normal tubing tears with only a little bit of pressure when it has a cut. But this tubing
(a thermal plastic urethane,but Rob is not letting the cat out the back telling me exactly what the trade secret is.)
has remarkable 'notch toughness'. This is obviously very important as far as wear and tear on the tubing is going to be a factor.

The tubing can streach to over double its length and is filled with soft braided dynema cord for strength. The Dynema cord limits the tubes streach to double its length and so takes all the pressure if stretched to the max with a big fish.

Both ends ot the float line are finished off with barrel swivels and a neat plastic coated dynema loop, as the tube does not twist at all. This was kind of a concern as I thought it might be difficult to handle on the boat.
Jeremy and Rob showed me how the line does not tangle and is neatly wrapped up using the figure of eight method, and then is tied up with the Velcro strap on the one end.

I found this a problem in the water, it was difficult to get the right side of the Velcro, if you get it wrong it pops off and was a pain to now have to wrap the whole thing again. The new system is a plastic buckle, like the one on the cray bag, with elasticized strap, much easier to clip closed and, when you have just got into the water, a one hand pinch releases the buckle which stays on the float end, much better.

First Impressions: Rob lent me one of the trial float lines and a couple of us headed up to Cape Vidal and a week or two later to Sordwana. Over the couple of dive trips I got to grips with the new bungie cord, it was in fact very easy to handle on the boat and did not tangle at all.

Unfortunately we did not get any really big fish to test the floatlines stretch on. The cord is not as soft as traditional bungie cords, and it needs a fair amount of pressure to start stretching. The cord needs about 20kg to exert the full stretch, a little less than what is required to pull down a 35 lt float and a little more than what is needed to pull down a 20 lt float and or 2 x 11 lt foam filled. Rob said that it was designed this way in order to be able to control and handle large fish. The problem with very long bungie cords is that difficult to put pressure on the fish when you need to.

I had rigged up my line with a 1m blue TPE (thermal plastic ethylene) bungie (3x stretch) going from my gun to the Ghost Leader Flasher, and then to the Bluewater Floatline Boingie. This meant that the fish would have to run a fare distance before getting to the floatline.

The Tester: Earlier this year I was fortunate to go to Barra Point in Mozambique, we were diving some deep pinnacles 15km off shore,hoping to get some good Wahoo.
Because Wahoo have relatively soft flesh, I added another soft TPE bungie between the Ghost Leader Flasher and the float line. I figured that if I got a Wahoo the soft bungees would absorb enough of the pressure on the first fast run to help the spear not to pull out.
I used a 20m Floatline Boingie attached to two 11l roto moulded floats with a speed pouch between them, giving me 60m of line when all the bungees were fully stretched out before the first float. That plus the 40m in the speed pouch would give me plenty even if I got a chance on a small marlin ... hey you never know!

We did not get any wahoo but I did get a nice Sailfish of 36kg, which tested the float line nicely. The sailly gave a very strong first run popping the speed pouch and releasing the 40m of stored line. The fish towed me around for about 15min and tired out fairly quickly pulling against Float line Boingie.
36kg Sailfish Speared off Barra Point Mozambique

Overall Impressions: Although the sailly was not a 50kg Dog tooth or a marlin it gave me a fair idea of the Rob Allen Bluewater Floatline Boingie's ability. When under pressure it stretched out doubling in length, and was very easy to handle and control. I would however probably go for the 30m boingie if I was targeting big tuna tho.

Coatesman

Monday, November 26, 2007

Xfin Composite Spearfishing Fins

The New Xfin Composite Spearfishing Blades

At a Glance: Well fins are fins ..right? And you could be forgiven for for going "Nice" fins. I suppose it is very difficult to judge fins just by looking at them. The workmanship looks very good and the finish is great. But does that make a fin work?


Closer inspection reveals a slightly different rubber track running along the blade edge, the blade is also fairly wide and long. And immediately invokes all sorts of questions. Questions Steve Ellis from Fibretech is more than happy to start unravelling. He has been working on these fins for a couple years and testing a number of theories out there.


The main thing is that we have a unique way of spearfishing on the east coast. We swim through surf, land up swimming for hours against currents all while trying to spearfish. Then there are the rocks in the shore break etc. So this started to mould ... "excuse the pun" the fins into what they are.
Steve being an accomplished Spearo wanted a fin you could easily swim on the surface for hours and at the same time give the drive needed for deep dives. A common fin to date has been the imported composites which are flat and don't have an angle up at the foot pocket. The fins work well going down or off the bottom, but that is where the love affair ends. They hack on the surface and you land up having to do huge bicycle kicks to move the fins.
The Xfin has a 20 degree angle and even in very heavy / stiff blades you notice how much easier that work on the surface.
One of my first questions was " wouldn't carbon be better than glass" but after chatting to Steve and understanding his theory on his blades it makes allot of sense. Glass (plus a secret polymer resin ... Steve is not telling) fins are extremely robust and are not brittle like the carbon fins .... a plus for coming in and out the surf. But the main thing is the way the blade converts the energy or another way conserves your energy. The idea is that the blade does the work not you.

Fist Impressions: I took a pair of Xfins on a recent trip, I chose a blade that was as stiff as the pair of imports that I currently own. Steve said I would need softer blades, but I was keen to compare apples with apples.
They were amazing, I dived 9 hours that day and even though the blades were very stiff I did not get the sore ankles and knees I was used to with my old fins. We dived mostly in water around the 18 -20m mark looking for large gamefish, and the Xfins were great in the deep.
The particular Xfins I was using were over 2 years old and you can see they had been well used, building my confidence in the promise of blades that would last.
After the trip I sent my foot pockets in to Steve and we chose a set of blades. I selected a blade that was softer than the pair I had tried. But I was still a little sceptical that the fins would preform and give me enough power of the bottom.


The Testa: I got my new Xfins yesterday arvo and decided to go and test them out. Interested to see how the lighter blades preformed. As I swam out I noticed that they were lighter, the wide blades did feel a little strange at first. I was kicking like I used to with the old flat blades and there was not same drive as before. I remembered how the pair I tried worked when using smaller movements, so I started to use smaller lighter movements and amazingly I did not slow down like I thought I would.


Overall Impressions: The concept really does work, I experimented with different strokes and it feels like I found the "sweet spot" where I was getting maximum speed out of least amount of effort. This I am sure will help with endurance on long dives allot, and help counter that fatigue that seems to make diving hard work when diving hard for a couple days in a row. So I had a great dive, and I think that with a couple more dives under the belt I will really grow into the Xfins.


In Parting: The Xfins Concept of a softer fin that through motion creates thrust works well. I think of the analogy of a Rock Cod and a Tuna fish. The Rock Cod has a larger soft tail while the Tuna a small hard tail. The Tuna is a faster fish but it vibrates its tail at a ridiculous pace to create that speed. I suppose if you think about it we are more like the old Rock Cod, and his movements are slower and more drawn out ...... and he still kicks down at a rate of knots. My point is that we would all like to be the tuna, but I think we are more like the Rock Cod.
Coatesman

Monday, July 16, 2007

Free Divers Weight Belt

The New Free Divers Weight Belt with the Glass filled Nylon Buckle

At a Glance: The Free Divers Weight Belt looks a little plain, and not as flashy as other weight belts on the market. I am reminded that Free Divers angle is to make practical equipment that works.
(Maybe this why it appeals to me, as I like everything plain and request my new guns in plain black and grey)

The buckle is new and it is glass filled nylon, my first impressions are that it wont be strong enough. But closed inspection and a fair bit of pulling and twisting ... or trying to twist. Its strong, warranted not as strong as the standard stainless steel. But I don't think you will break it unless you take a hammer to it.

First Impressions: I took the lead weights off my old weight belt which was one of Free Divers first belts which I found out at sea one day ...... (it work so I kept it)
I noticed that the new belt was slight less stretchy, again being the skeptic that I am I thought that this was not a good thing.
The lead weights went on fine and the thickness off the rubber belt is perfect, and its matt finish holds the weights nicely.

The Testa: After a number of dives over the last few weeks I have grown to like this weight belt, the 'lack' of stretch is a good thing. It is funny how you learn to live with things. My old belt used to sag allot when walking along the beach and I would have to make it rather tight to not flop around. The new Freedivers weight belt seems to just right.
The buckle seems to have held out and there are no signs of failing. The action of the buckle is good and releases quickly if the need arises.

Overall Impressions: This not a flashy product ..... it is practical & functional. You can get weight belts that have a so called 'better' finish but lets be honest its not really a fashion show ..... well not for most of the guys I know.

In Parting: The weight belts are available in different sizes, one of the few belts that you dont have to cut or punch holes in. So if you are a skinny chap or a larger than life kinda guy you will probably find the right size belt for you.

Coatesman

Wednesday, June 27, 2007

C-Ski 440 by Steve Ellis

"Spumbu" C-Ski 440 made by Steve Ellis at Fibre Tech

At a Glance: The C-Ski 440 by Steve Ellis is an impressive boat, very 'clean and simple'. I think you would have to be a seasoned spearfishermen to appreciate its design. It comes without the flare and finished you find on show room floors.
But having designed and built a boat, I understand it to be functional design. I will let you in ona little secret.... I copied much of what I saw Steve doing when I designed my boat.

First Impressions: Lets take a look at the C-Ski 440's layout. If you are looking at the C-Ski with a center console then this what you will get.
Starting at the transom there is a small hatch, big enough for a yellow safety can and life jackets etc. It is quiet deep and any thing you dont want fish on can go in there.
Next is the center console, the battery lives in here and there is some space for some extras. There is enough space on the center console for a gps / fish finder and compass. The steering and controls will be up to you to decide on ... and thats another whole discussion.
The fish (main) hatch is nice and big, it was designed for spearfishing. Steve is an experienced spearo and designed the boat to suit the needs of spearfishermen. Thats why when you look at most smallish boats designed for fishing the hatches are frustratingly small.
The fuel hatch takes one 25l standard fuel can (the flat one you get with the motor). There is space for a small 10l or15l spare.

The Testa: I was recently up in Mozambique and Iain Ewing brought his C-Ski 440 with. We had fairly good conditions, but did have the odd trip in some serious weather. So I think I have a pretty good idea of how the boat preforms on the water and its practicality for Spearfishing.
The ride for a small boat is excellent, look there was the odd chop that the boat did bounce a little and the occasional spray of bow water. But I have been on most small boats available and this is the one that stands out.


Three of you were on the boat and one must remember Iain is no small chap. This did mean that we had to be conscious of each others movements on the boat. Especially when getting on and off between dives. The C-Ski is only 1.75m wide and being a mono hull does roll a little. There are very few small boats that dont roll, and normally the ones that dont are flat hulls and are terrible on the water.

The sides are low in the water (check the pic of Spumbu on some other trip in Mozam) This makes getting on and off very easy. Some water does wash over the back but this is seriously not an issue, as there is nowere for the water to sit and drains off quickly. Even in the surf, the boat holds very little water on the deck and does not get bogged down at all.

The deck space and functionality of the C-Ski is very good. We each had 2 or 3 guns and all our kit. Everything stashed away nicely in the gunbags and in the main hatch when launching and coming in. The only thing is that we had to have a spare 25l fuel can on the deck. I think this the only place that needs attention. We were traveling long distances and had to change tanks every day. Perhaps there should be space for 2 x 25l standard spuggs in the fuel hatch?

Overall Impressions:
You can understand why so many seasoned spearo's land up owning one of Steve's C-skis. It's just so functional, no frills gonna do the job boat. I would say it is probably the best boat in its class. (3man single motor boat) There are some great hulls out there, but Fibre tech seems to be the only one making this size boat at the moment that works.

I did some sums the other day for a guy for whom I am organising a boat for through Steve and the total cost came to R75 000. But thats for everything from start to finish, with all the bells and whistles. It seems allot but if you look at what else is available and you find your self coming back and having another look.

The costs worked out like this:
Basic Boat - R19 500
Extras -R 9825 (center console, controls, keel strip, covers ect)
Trailer - R 10 800
40 Yamaha - R29000

If you want to go with 2 motors the boats and cost sky rocket into the R100000.00 range very quickly, so thats another ball game altogether.

Would I own one? ........ For sure!

Coatesman

Tuesday, June 19, 2007

Freedivers Aqua Glide Chicle Wetsuit Top

At a Glance: During late winter last year while picking up stock from Freedivers Shane showed me his Aqua Glide Chicle wetsuit hooded jacket. I had seen guys using them and had always wondered what the attraction was.

The neoprene that suit is made from is ultra soft and stretchy5.5mm Yamamoto Chicle neoprene, which has no nylon material on the outside. It is smooth and is designed to dry quickly in the wind making it ideal for boat diving.
I could see how the suit would be warm and comfortable. But warning bells went of on the durability of the suit. Shane however convinced me to try one ......

First Impressions: Being a very fussy person I did not think the guys at Freedivers would get the wetsuit right first time. But to my surprise the hooded jacket was so snug and comfortable, molding to my body perfectly. I was again surprised at how maneuverable I was even more than a standard double nylon 3mm suit and this was 5.5mm of neoprene!
Shane ran through how to care for the suit and I was on my way.

I cant really remember the first dive in the Aqua Glide top, but I do remember being so snug and commenting to my mate that it was like waring a warm jersey. It was so good, I cant remember diving in anything else until late November

The Testa: Over a couple months of seriously hard diving, mostly shore entry chicle neoprene wetsuit top was starting to prove its self. On the comfort and warmth side there is nothing you can say against the suit, all the glued seams were holding and did not show any sign of failing.
I had started to collect some nicks on the back from carrying fish along the beach and my spear had made a small tear on my arm. All of these were cosmetic and the small tear fixed with some wetsuit glue.

But one Saturday morning in late November I tore the suit. The sea had warmed up considerably and the day turned into a stinker. The Cuta had turned on and I pushed a long dive to the point of exhaustion. Getting back to the beach some 2km from the car and a hand full of cuta on the stringer, I decided to take the top off and not bake in the already overbearing heat.
Not thinking I tried to take the suit off as per usual and tore open the back. While sorting all my kit out on the beach the suit had dried stopping it from sliding on itself. Usually I wet myself down and fold the bottom up and full it with water, then there is no problem.

The suit was fixed, and have had no problems since. I suppose that could be the up side of stichless suits is that a little bit of glue can fix anything. (I would take it to Shane to fix they will do a better job and have some glue that is amazing, way better than the off the shelf stuff.)

Overall Impression: The Aqua Glide suit for me is the next step up in wetsuits. Remember when you first started diving in an open cell suit, and you felt so comfortable and warm vowing never to go back to a double nylon suit? Well diving in this suit is much like that, not that I would never dive in my standard open cell suit again - because of practical reasons. Its just that I wish I could dive in it all the time.

The Chicle neoprene suit has a specific purpose, and like any specialist piece of equipment if you use it in the wrong application you will land up abusing it and it will not last. Crayfishing is one of those areas, you cant go wedging yourself in a barnacle infested crack to pull some buggs and expect to come out unscathed!

If you do allot of boat diving, or don't really catch crayfish this is maybe an option. I feel the cold real easy, I even get cold in summer! And this suit has been fantastic in terms of warmth.

Pro's:

  • Super comfortable
  • Probably the warmest suit you can get.
  • Excellent for boat diving, as the it drys quickly and does not chill in the wind while traveling. So you don't need to take a windbreaker anymore.
  • Made locally - previous chicle suits were all imported with little or no backup service.
Con's:
  • Not a 'tough' suit (keep in mind its purpose)
  • You need to look after it
Tip's:
  • Use loads of lubrication when taking on and off. This (for some) is a mission but worth it. Conditioner works better than shampoo, and aqueous cream is also good. I sometimes use a mix half aqueous cream and conditioner.
  • Dry the suit inside out, and out of direct sunlight. My suit started to grow moldy from never drying properly ...... might have been because I was diving every day.
Interesting Facts:
  • Yamamoto Neoprene is used by Picasso, Elios and other leading wetsuit manufactures.
  • Yamamoto Neoprene is not manufactured from petrol, but from limestone, which contains up to 99.7% of calcium carbonate.
  • Giving The wet suit a more even density of the neoprene (better insulation, better buoyancy, material resistant to compression damage)
  • Higher elasticity similar to that of human skin, thus adding extra comfort.
Coatesman

Friday, June 15, 2007

Rob Allen Ghost Leader Flasher

At a Glance: The Rob Allen Ghost Leader Flasher or the Inline Flasher just looks like another gizmo to clutter the dive bag. That said I am a flasher freak, during summer I dive with more Bling than some ghetto pimp rapper busting some gangsta hip hop in some seriously iced up jewelry. So a couple months ago when I feasted my eyes on the ghost leader flasher which was still in the experimental stages I was immediately curious. After a little bit of persuading, Jeremy Williams of the Dive Factory parted with his one. And ...... well I have not looked back.

First Impressions: One my first dive I realised had something special, however this is not going to be for every spearfisherman. I quickly found that if you like your kit simple this will not be for you. The rotating metal propellers hook your line quiet easily, and getting the line off your gun after swimming through the surf can be a bit of a trick. (I have found some solutions ....will tell you about them later tho.)
That first dive I did not see any fish and the buoyancy on the ghost line was wrong, but I could see the potential. In my mind I could almost see the Cuta swimming in on me.

The Tester: My first real taste of the potency of this flasher came on a recent trip to Mozambique. The Ghost Leader Flasher had had some mods since I first used it. There were now 2 floats on the line and they were positioned about 5m from the flasher allowing the flasher to sit 5m below the surface when resting. Not very deep, but better than it being on the surface.

This how my rig was set up for that trip:
From the gun I had a 3m bungie (which I later replaced with a shorter one, to bring the flasher closer to me), then the Ghost Leader Flasher which was set up with 5m of ghost line then the 3 spinning flashes on stainless cable, and another 5m of ghost line with the 2 floats. I then had a 5m bungie going onto my buoyline.

Again I realised that this added a curve ball to the equation, taking that extra time to wind up and unwind ever time I got on and off the boat.

That said the fish I had come in on me was amazing, and even though the vis was not great and the fish not thick. 70% of the fish I shot were coming in on the flasher above my head. One of the guys on the trip even commented that he could hear me working the flasher from the surface as the propellers whirred in the water.

It was also great to watch the response of the Kingfish, they would be disappearing into the gloom and one or two pulls on the flasher and they would do an about turn and come back.
I even had a cuta come back on me, I had dived down and saw a cuta swimming off in the distance too far away to even chase. Leveling out I worked the flasher only to see the Cuta turn around and commit 'Taliban' as it swam literally onto my spear.

Overall Impression: It is totally new dynamic diving with the Ghost Leader Flasher, I am used to shooting most my fish from above or on the same level. Now the fish come in and you land up shooting up at a 45 degree angle. For some reason I have found that the Cuta are quiet skittish (or just excited) when coming in and dont like to be chased from this angle.
That said if you take aim without hesitating, you can normally hit the fish with out having to swim towards the fish.

I don't think this will totally replace the traditional flasher, but it does give that extra edge to your diving. I have gotten so used to diving with the inline flasher that it has become part of my standard setup. And now as winter has approached I would have usually not taken a flasher as the cuta thin out, now I always have one. This payed off a couple weeks ago when a 20kg Cuta came near the surface to take a look at the flasher working behind me as I swam up the current. The fish promptly swam right underneath me 'Taliban Fish'.

The pro's and con's:

Basic Pro's
  • You draw the fish to you while on the bottom.
  • don't have to keep swimming after your flasher float.
  • It is part of your gear, not something else you have to swim with.
Con's
  • It can be a hassle, hooking your buoy line.
  • Having to carry the extra fish up the beach :-)
Tip's
  • Wind up only the ghost line on your gun, tie the rest of your buoy line up. This will reduce the line getting snagged.
  • I have found that the flasher works best with a long bungie to help floats as the bungie cord is buoyant. This means that when you pull down the flasher returns towards the surface quicker, creating a better action. This said I am currently diving with no bungie (simple rig) and it works fine.
  • When on the bottom face with the current that way your flasher is slightly in front of you, and you are facing towards the fish swimming up current.
  • The Ghost Leader Flasher also works great with a reef hook and reel gun. Find your favorite drop-off or pinnacle, hook up on the current side and dive around the flasher working in the current.
In Parting: Rob Allen's Ghost Leader Flasher is definitely something to try out.

Coatesman